How to Remove Moisture and Condensation from Headlights
Hey there, fellow car enthusiasts! If you’re like me, you take great pride in your vehicle, and one thing that can really put a damper on that pride is when you find moisture or condensation inside your headlights. It not only affects the aesthetics of your car but can also be a safety hazard, reducing visibility when driving at night or in adverse weather conditions. In this guide, I’ll walk you through everything you need to know about headlight moisture and condensation, from understanding the causes to tackling the issue head-on and preventing future occurrences.
Understanding Headlight Moisture and Condensation
Let’s start with the basics. Headlight moisture and condensation are common issues faced by car owners. Moisture can find its way into your headlights due to various factors, such as damaged seals, temperature fluctuations, or even driving through heavy rain. This moisture can accumulate over time, leading to condensation, foggy headlights, and reduced illumination.
The impact of moisture on headlight performance is more significant than you might think. Not only does it affect the clarity of your headlights, but it can also lead to long-term damage, including corrosion and electrical issues. So, addressing these problems promptly is essential for car owners who want to maintain their vehicle’s aesthetics, safety, and longevity.
Common Causes of Headlight Moisture
Now, let’s dive deeper into the causes of headlight moisture. Understanding what leads to moisture buildup is the first step in preventing it from happening again. Common causes include damaged seals or gaskets around the headlight housing, temperature differentials between the inside and outside of the headlight, and even the natural process of condensation that builds up over time.
Weather conditions can also play a significant role. If you live in an area with extreme temperature variations or high humidity, you’re more likely to encounter headlight condensation. It’s crucial to recognize these factors to address the issue effectively.
Detecting Moisture Inside Your Headlights
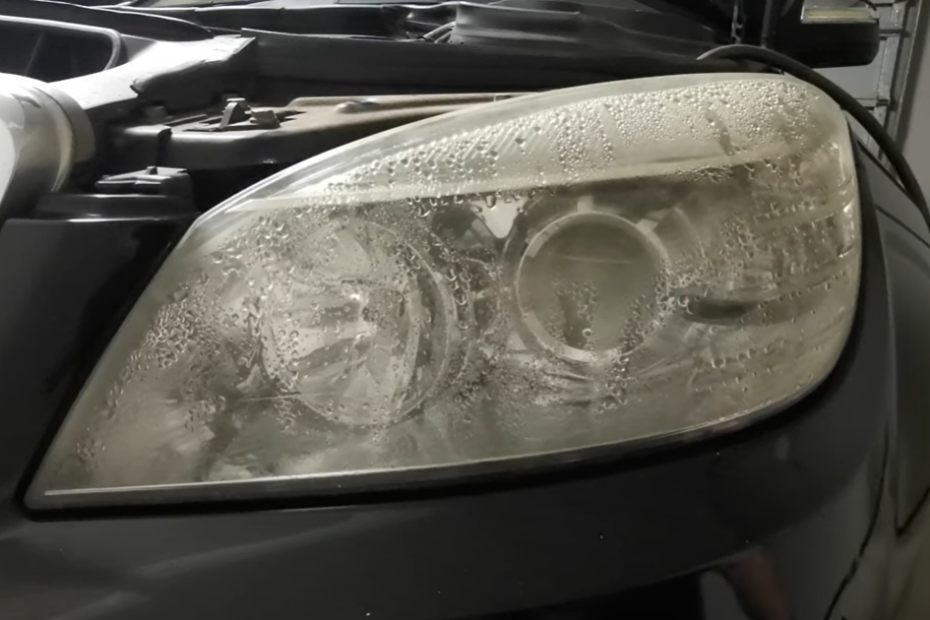
Detecting moisture inside your headlights is relatively straightforward. You may notice water droplets inside the lens or a misting within the headlight when you turn on the headlights. If left unattended, larger water droplets can form, affecting your visibility.
Recognizing the early warning signs is crucial. If you start to notice condensation that builds up when your headlights generate heat, it’s a clear indication that moisture has found its way in. Ignoring visible moisture in your headlights is not an option, as it can lead to more significant problems down the road.
Removing Minor Condensation
Minor condensation can often be resolved without too much hassle. There are several DIY methods and precautions you can take to safely eliminate minor condensation. Before attempting any fixes, it’s essential to check your headlight housing vent. Most headlights have a vent designed to prevent condensation buildup, but it can become blocked by debris or dust.
Carefully wipe the vent or use compressed air to clear any obstructions without pushing debris further into the headlight housing. Once the vent is clear, you can employ natural methods like sunlight or even a bag of rice to absorb the moisture and remove minor condensation. However, if you’re not comfortable working with sealants or the condensation persists, it might be best to consult a mechanic.
Tackling Major Condensation
Major condensation requires a more comprehensive approach. In these cases, you’ll need to remove the headlight unit to access the affected areas. Consult your vehicle’s service manual for instructions on removing the headlight bulb, electronics, plugs, and other components.
To eliminate major condensation, you can use a hairdryer to blow hot, dry air into the vent or on the outside of the headlight unit. As it heats up, it should dry out the moisture. However, it’s essential to wait for the headlight unit to cool off to determine if this strategy was effective.
For a thorough moisture removal process, you may need to remove the seal and the clear plastic headlight cover from the housing. Carefully wipe off the existing moisture with a lint-free cloth, ensuring it’s clean and dry before use.
Comprehensive Moisture Removal
To ensure all moisture is effectively eliminated, you can use silica gel packs placed inside the headlight assembly. These packs are designed to absorb any remaining moisture in the air, leaving your headlights dry and clear.
This comprehensive moisture removal process is more time-consuming than other options but guarantees a thorough solution. It involves the use of hand tools like sockets and screwdrivers, as well as the application of a sealant to reseal the headlight adequately.
Before attempting this method, it’s essential to consult a service manual to understand how to remove your seal properly. Improper reinstallation can allow more moisture to enter your headlight, defeating the purpose of the repair.
Preventing Future Moisture Buildup
Preventing future moisture buildup is key to maintaining clear and functional headlights. Proactive steps include regularly inspecting the seal for any damage or debris. If needed, you can run a bead of silicone sealant around the factory seal area to ensure no moisture can enter the assembly.
In addition to sealing, consider using products like silicone spray to protect O-rings that safeguard electrical connectors, bulbs, vents, and other components of your headlight assembly. These products are valuable in preventing water from getting inside your headlights and causing condensation.
By taking these preventive measures, you can save yourself the headache of dealing with headlight moisture in the future.
Impact of Moisture on Headlight Performance
Understanding how moisture affects headlight functionality is crucial. Moisture can cause electrical issues, affecting the performance of your headlights. Additionally, the presence of condensation or water droplets inside your headlights can obstruct the light beam, reducing visibility while driving at night.
Neglecting headlight condensation can lead to long-term damage,
including corrosion of electrical connections and damage to the headlight bulb. The moisture can also cause foggy headlights, which not only look unattractive but also hinder the effectiveness of your headlights.
Furthermore, excessive moisture can affect the internals of your headlight assembly, leading to more significant issues that may require costly repairs. It’s essential to address headlight moisture promptly to prevent these consequences and ensure your headlights are performing at their best.
When to Consider Headlight Replacement
In some cases, headlight condensation or moisture buildup can be so severe that repairing the existing headlights may not be a viable option. It’s essential to know when it’s time to consider headlight replacement.
Indicators that it might be time to replace your headlights include:
Irreparable Damage: If the moisture issue has caused irreversible damage to the internal components of your headlights, such as the reflector, wiring, or lens, replacement may be the only solution.
Ongoing Moisture Problems: If you’ve attempted multiple repairs, and the moisture problem keeps coming back, it’s a sign that the headlights may have structural issues that can’t be fixed.
Safety Concerns: If the moisture issue is severely affecting your visibility while driving at night or in adverse weather conditions, it’s a safety concern that shouldn’t be ignored.
When considering headlight replacement, it’s essential to select suitable replacement headlights for your vehicle. Consult your car’s manufacturer or a trusted mechanic to ensure compatibility and optimal performance.
Expert Tips for Headlight Maintenance
To keep your headlights in top condition and prevent moisture issues, here are some expert tips:
Regular Inspections: Perform visual inspections of your headlights regularly to check for any signs of moisture, condensation, or damage to the seals.
Seal Maintenance: Ensure that the seals around your headlights are intact and free from damage or debris. Clean and reseal them as needed to prevent moisture infiltration.
Ventilation: Keep the ventilation system around your headlights clear and unobstructed to allow for proper airflow and moisture prevention.
Professional Help: If you’re unsure about addressing headlight moisture issues or need assistance with repairs, consult a professional mechanic or auto body shop with experience in headlight maintenance.
Protective Coatings: Consider applying a protective coating or sealant to your headlights as an extra layer of defense against moisture and other environmental factors.
Parking Considerations: Park your car in a covered or sheltered area when possible to reduce exposure to extreme weather conditions that can contribute to moisture buildup.
Conclusion
In conclusion, headlight moisture and condensation are common issues that can affect the aesthetics, safety, and performance of your vehicle’s headlights. Understanding the causes and taking proactive steps to prevent moisture buildup is essential for any car owner.
Whether you’re dealing with minor condensation or more severe moisture problems, addressing these issues promptly and effectively will ensure that your headlights remain clear, functional, and safe. Remember, regular maintenance and inspections can go a long way in preventing future moisture-related headaches.
So, don’t let headlight moisture dampen your driving experience. Take action, stay informed, and enjoy the road with clear and reliable headlights. Safe travels!
FAQs
Q1: Can I use a heat gun to remove moisture from my headlights?
A1: Yes, you can use a heat gun to eliminate moisture from your headlights. However, be cautious not to overheat and damage the plastic lens or seals. Use the lowest heat setting and keep the heat gun moving to avoid concentrated heat in one area.
Q2: Will leaving my car in the sun help remove condensation from headlights?
A2: Yes, leaving your car in the sun can help reduce condensation inside your headlights. The heat from the sun will promote evaporation and help clear the moisture. However, this method is more effective for minor condensation.
Q3: Can I reseal my headlights myself using silicone sealant?
A3: While it is possible to reseal your headlights yourself using silicone sealant, it’s crucial to follow proper procedures and ensure a watertight seal. If you’re not confident in your DIY skills, it’s advisable to seek professional help to avoid potential issues.
Q4: What should I do if I notice condensation that builds up when I turn on my headlights?
A4: If you notice condensation forming when you turn on your headlights, it indicates moisture inside your headlights. Try to address the issue as soon as possible by using some of the methods mentioned in this article or consult a mechanic for assistance. Ignoring it can lead to more significant problems over time.